
Mastering U.S. Airport Hubs: Strategies for Smoother Connections
This guide settles the debate between booking for speed versus reliability by defining the realistic time buffers required to navigate complex U.S. airport hubs.
Key takeaways
| Takeaway | Detail |
|---|---|
| 45–60 minute domestic buffer | Standard domestic-to-domestic connections require this window to account for gate-to-gate transit. |
| 90–120 minute international buffer | Domestic-to-international connections necessitate this extra time for terminal changes and security. |
| Zero protection on separate tickets | Self-booked itineraries leave you financially and logistically responsible if a delay causes a missed flight. |
| Mandatory baggage re-check | International arrivals must collect and re-check luggage at the first U.S. port of entry regardless of final destination. |
| Terminal transit risks | Many hubs require exiting and re-clearing TSA security when moving between terminals, which is a leading cause of missed connections. |
| MCT is not a guarantee | The official Minimum Connection Time is a technical system threshold, not a recommendation for a stress-free transit. |
Useful thresholds
| Item | Rule / threshold |
|---|---|
| Domestic-to-Domestic Connection | 60–90 minutes (Large Hubs) |
| Domestic-to-International Connection | 120–150 minutes (Large Hubs) |
| Minimum Connection Time (MCT) | 30–40 minutes (Technical threshold only) |
| International Arrival Buffer | 120+ minutes (Includes customs/re-check) |
| Separate Ticket Buffer | 3–4 hours (Recommended for self-transfers) |
This guide settles the debate between booking for speed versus reliability by defining the realistic time buffers required to navigate complex U.S. airport hubs. It is designed for frequent flyers and leisure travelers alike who need to distinguish between airline-provided Minimum Connection Times and the actual time required to successfully navigate terminal transfers, customs, and security.
Recent shifts in airport infrastructure and increased passenger volumes have rendered legacy connection strategies obsolete. As of 2026, travelers must now account for modernized security screening throughput and stricter baggage interlining policies, which significantly impact the viability of tight connections at major hubs like ATL, ORD, and DFW.
Minimum connection times for domestic and international flights
Minimum connection time (MCT) is the shortest interval permitted between flights in a single booking, enforced by reservation systems to prevent physically impossible connections. For domestic-to-domestic transfers, 45 to 60 minutes is the industry standard at most U.S. hubs, though larger complexes like Atlanta (ATL), Chicago (ORD), and Dallas (DFW) often mandate 60 to 90 minutes to account for extensive gate-to-gate distances and terminal changes. Domestic-to-international connections generally require 90 to 120 minutes, with high-traffic hubs like Los Angeles (LAX) occasionally demanding up to 150 minutes to navigate security and terminal transfers.
These figures are calculated based on average walking speeds and typical transit infrastructure efficiency, not worst-case scenarios. Reservation systems automatically reject itineraries falling below these thresholds. However, MCT does not guarantee a successful transfer during irregular operations such as weather delays or air traffic control ground stops. Because these times represent baseline averages, they offer zero buffer for late arrivals or extended security queues.
The most critical error is relying on official MCT for self-booked itineraries on separate tickets. When booking flights independently, you assume full responsibility for the entire transfer process, including exiting the secure area, reclaiming checked baggage, re-checking in with the second carrier, and clearing TSA security again. In these scenarios, the second airline has no obligation to rebook you if your first flight arrives late. Always add at least 90 minutes to the published MCT when managing separate tickets to account for these logistical hurdles.
International-to-domestic connections require mandatory baggage reclamation at the first point of entry into the United States, regardless of your final destination. Even with Global Entry or Mobile Passport Control (MPC) expediting customs clearance, you must physically collect your bags and re-check them at the transfer desk. This process adds significant time frequently underestimated by travelers. If your transit involves changing airline alliances, verify baggage interlining policies beforehand, as some carriers will not transfer bags to a non-partner airline on separate tickets.
Use the following benchmarks as a baseline for planning your next trip through major U.S. hubs.
| Connection Type | Minimum Buffer (Minutes) | Risk Level |
|---|---|---|
| Domestic to Domestic | 60 | Moderate |
| Domestic to International | 120 | Moderate |
| International to Domestic | 150 | High |
| Separate Tickets (Any) | 240+ | Extreme |
To ensure a reliable transit, prioritize booking single-ticket itineraries where the operating airline assumes responsibility for rebooking during disruptions. If you must book separate tickets, aim for a minimum of four hours between flights to insulate your travel against delays. Always check the official airport authority website for terminal maps before departure to confirm if your transfer requires exiting and re-clearing security.
How to identify terminal changes and security requirements

Confirm your terminal and gate information via the official airport authority website or your airline’s mobile app no earlier than 24 hours before departure. Airport layouts are dynamic, and gate assignments frequently shift due to aircraft maintenance, crew scheduling, or ground traffic congestion. Relying on printed boarding passes or early email notifications often leads to outdated information, as major hubs like Chicago O'Hare or Atlanta Hartsfield-Jackson may reassign gates minutes before your arrival.
Terminal changes often force you to exit the secure airside area and re-clear TSA security, which adds significant time to your transit. While some hubs feature airside shuttles or post-security walkways, others require you to navigate landside transit systems such as automated people movers or buses. If your itinerary requires a terminal change, assume you must clear security again unless the airport map explicitly confirms an airside connection. This transition is the primary failure point for tight connections, as it subjects you to the current volatility of security wait times.
You can identify if a terminal change requires re-clearing security by reviewing the inter-terminal transit map on the airport's official website. Look for designations labeled as airside connectors versus landside shuttles. Airside connectors allow you to remain behind the security checkpoint, while landside options necessitate exiting the terminal building entirely. If you are traveling on separate tickets, this process is mandatory because you must exit the secure area to reach the check-in counter of your second carrier to drop bags or obtain a new boarding pass.
Failure to verify these requirements before landing is a common mistake that leads to missed flights. Travelers often assume all terminals at a hub are connected airside, only to find themselves forced to exit to a landside shuttle bus during peak hours. If you hold elite status or a premium credit card, check if your airline provides a dedicated escort or priority lane access for terminal transfers, though these services are rarely guaranteed for self-booked connections.
| Transit Type | Security Status | Typical Requirement |
|---|---|---|
| Airside Shuttle | Remains Secure | No re-screening |
| Landside Shuttle | Exits Secure Area | Full TSA re-screening |
| Terminal Walkway | Varies | Check airport map |
| Separate Tickets | Always Exits | Full check-in and re-screening |
Before you depart, verify your arrival and departure terminals using the airline’s real-time flight status tool. If your connection involves a terminal change, add at least 60 minutes to your buffer to account for the potential for landside transit and security screening. Always prioritize single-ticket bookings to minimize the risk of being left without rebooking support if a terminal transfer takes longer than expected.
Worked example
When planning a trip from Seattle (SEA) to Charlotte (CLT) with a connection at Dallas/Fort Worth (DFW) for travel this coming October, avoid the temptation to book the tight 40-minute connection window offered by some search engines. While DFW’s official minimum connection time is 40 minutes, relying on this leaves zero margin for error during peak afternoon congestion. Instead, prioritize itineraries with at least a 90-minute buffer, which typically adds only $30–$50 to the total fare but significantly reduces the risk of missing your second leg. If you are traveling on separate tickets, this extra time is essential to account for exiting the terminal, re-checking baggage, and clearing TSA security again. To implement this, use the "filter by connection time" tool on your preferred booking site to set a minimum layover of 90 minutes, ensuring a stress-free transition through one of the nation's busiest hubs.
Navigating airside shuttles versus landside terminal transfers
Airside shuttles enable terminal-to-terminal transit within the secure area, bypassing TSA re-screening entirely. These systems operate on dedicated, restricted-access roadways or tunnels connecting specific concourses within a single airport hub. If your connection requires a terminal change, verify the availability of an airside connector on the airport authority website before departure. Relying on landside options when an airside path exists is a primary cause of unnecessary delays, as landside transfers force you to exit the terminal, navigate public transit, and undergo full security screening again. At major hubs like Chicago O'Hare (ORD) or Los Angeles (LAX), landside transit often involves automated people movers or shuttle buses operating on fixed schedules. Always account for the additional 45 to 60 minutes required to clear security a second time if your itinerary forces a landside transition.
The distinction between airside and landside transfers is critical for self-booked itineraries. If you hold separate tickets, you are legally required to exit the secure area to collect checked bags and re-check them at the departure terminal's ticketing counter, regardless of whether an airside shuttle is available. This process effectively mandates a landside transfer. Attempting to use an airside shuttle to reach a connecting flight on a separate ticket is generally impossible, as you would be unable to access your luggage or fulfill the check-in requirements of the second carrier. Airside shuttles remain the default for same-ticket connections only when the airline operates a continuous itinerary under a single confirmation code.
| Transfer Type | Security Status | Typical Requirement |
|---|---|---|
| Airside Shuttle | Remains Secure | No re-screening |
| Landside Shuttle | Exits Secure Area | Full TSA re-screening |
| Terminal Walkway | Varies | Check airport map |
| Separate Tickets | Always Exits | Full check-in and re-screening |
Before arriving at the hub, confirm your specific terminal and gate assignment using the airline's real-time mobile app. Airport layouts are dynamic, and gate changes can shift a connection from an airside-accessible route to one requiring a landside exit on short notice. If you discover a terminal change upon landing, immediately identify if the airport provides an airside shuttle to avoid the security checkpoint. If you are forced into a landside transfer, prioritize using TSA PreCheck or CLEAR, though these services do not guarantee a specific throughput time during peak travel periods. For connections under 90 minutes, an airside shuttle is the only viable option; landside transfers should never be attempted on tight connections unless the airport explicitly confirms a dedicated expedited lane.
Rules for checked baggage on separate tickets

Checked baggage is not interlined between separate tickets; you must collect your luggage at baggage claim and re-check it at the departure terminal for each individual booking. Because most U.S. carriers have ended through-checking agreements for self-booked itineraries, treat every separate ticket as a ground-up travel event requiring you to exit the secure airside zone, navigate to landside check-in counters, and clear TSA security again before reaching your gate.
This requirement stems from airline liability and operational costs. Separate tickets lack a unified contract of carriage for baggage transfers between systems. If you fail to collect your bags, they will not automatically route to your next flight, and the second airline has no obligation to assist in locating them. Even with elite status or within the same airline alliance, most agents will refuse to tag bags through to a separate confirmation number.
Exceptions exist only when separate tickets are linked by the airline under a single PNR or when traveling on a codeshare agreement that specifically permits interlining. Do not assume this protection applies just because flights are operated by partner carriers. Always verify with the check-in agent at your origin airport if they can see your onward booking in their system. If they cannot, plan for the full baggage reclamation process.
The most common mistake is failing to account for the baggage cutoff time at the second airline's check-in desk. Most U.S. domestic carriers require checked bags to be dropped at least 45 to 60 minutes before departure. If your first flight arrives late or you spend too much time navigating the airport, you will miss this window, even if you arrive at the gate before boarding closes. This is a hard operational deadline that cannot be waived by gate agents.
| Scenario | Baggage Handling | Action Required |
|---|---|---|
| Single Ticket | Automatic Transfer | None |
| Separate Tickets | Manual Retrieval | Re-check at desk |
| International Arrival | Mandatory Customs | Re-check at transit desk |
| Partner Codeshare | Conditional | Verify at check-in |
To mitigate this risk, assume you need at least 90 minutes beyond the standard minimum connection time to handle luggage logistics. If flying with multiple checked bags, add an extra 30 minutes to account for carousel wait times and the walk to the next terminal. If your itinerary involves a change of alliance or low-cost carriers, assume interlining is impossible and book your connection with a minimum four-hour buffer to ensure you can clear security and meet the second airline's baggage cutoff.
Optimizing transit with TSA PreCheck and CLEAR
TSA PreCheck and CLEAR are distinct services that function independently to expedite different stages of the security process, and combining them provides the most efficient transit through major U.S. hubs. TSA PreCheck provides access to dedicated lanes where you are not required to remove shoes, belts, light jackets, laptops, or 3-1-1 liquids from your carry-on bags. CLEAR uses biometric verification—specifically iris scans or fingerprints—to move you to the front of the document check line, where you then proceed to the physical screening process.
When used together, CLEAR handles the identity verification step, effectively bypassing the standard document check line, while your TSA PreCheck status ensures you remain in the expedited screening lane. This dual-layer approach is particularly effective at high-traffic hubs like ATL, ORD, and LAX, where document check queues can exceed 20 minutes during peak travel windows. Note that CLEAR is not a substitute for TSA PreCheck; if you use CLEAR without PreCheck, you will still be subject to standard screening protocols, including the removal of electronics and liquids.
| Service | Primary Function | Expedited Benefit | Typical Cost |
|---|---|---|---|
| TSA PreCheck | Security Screening | Keep shoes/liquids on | $78–$85 (5-year term) |
| CLEAR+ | Identity Verification | Skip document check line | $189/year |
Eligibility for these programs is not universal across all airports or airlines. You must verify that your departure airport operates both a CLEAR kiosk and a TSA PreCheck lane, as some smaller regional terminals or specific concourses may lack one or both services. Additionally, you must ensure your Known Traveler Number (KTN) is correctly entered into your airline reservation profile at least 24 hours before departure to ensure the PreCheck indicator appears on your boarding pass. Without this indicator, you are ineligible for expedited screening regardless of your membership status.
A frequent error is assuming that CLEAR membership provides priority access to TSA security lanes during irregular operations or terminal transfers. If you are forced to exit the secure area due to a terminal change, CLEAR may save time at the document check, but it cannot override the physical throughput limits of the TSA screening equipment itself. During peak holiday travel or mass flight disruptions, even expedited lanes can experience significant volume, and these services do not guarantee a specific wait time or a successful connection.
To optimize your transit, verify your KTN is saved in your frequent flyer profile for every airline you book, as legacy systems often fail to import this data automatically. If you hold a premium travel credit card, check your benefits portal to see if it provides a statement credit for either program, as many cards offer full reimbursement for these annual fees. Before your next trip, confirm the availability of CLEAR and PreCheck at your specific departure and arrival terminals using the airport’s official website to adjust your arrival buffer accordingly.
Strategies for accessing lounges during tight layovers
Do not access a lounge if your connection time is under 60 minutes, as transit time to and from the lounge typically exceeds the benefit. Lounges are viable only when your scheduled layover exceeds 90 minutes, providing a buffer for terminal navigation and boarding delays.
Lounge access is governed by physical proximity to your departure gate. Major U.S. hubs are sprawling complexes where a lounge may be in a different concourse or terminal than your arrival or departure gate. If you must transit between terminals to reach a lounge, you risk missing your flight due to security bottlenecks or shuttle delays, even with elite status or premium credit card access.
Exceptions exist for travelers with elite status or specific premium credit cards that offer dedicated service desks within the lounge. In these cases, the lounge functions as a tactical asset for rebooking during irregular operations rather than a place for rest. If you encounter a delay or cancellation, prioritize entering the lounge immediately to speak with a dedicated agent, who often possesses greater authority and resources to rebook you on partner airlines compared to general gate agents.
A common error is assuming that lounge networks like Priority Pass or airline-specific clubs are available in every terminal. Many hubs have limited lounge coverage, and some terminals have no accessible lounges. Always verify the specific terminal and gate location of the lounge via the provider's app before leaving your arrival gate. If the lounge requires re-clearing security in a different terminal, the time cost is rarely justified for a connection shorter than two hours.
| Connection Window | Lounge Strategy | Risk Level |
|---|---|---|
| Under 60 Minutes | Avoid; proceed directly to gate | Extreme |
| 60 to 90 Minutes | Use only if gate is adjacent | High |
| 90 to 120 Minutes | Use for quick service/rebooking | Moderate |
| Over 120 Minutes | Full access; monitor flight status | Low |
Before heading to a lounge, check your airline's mobile app for real-time gate changes. If your departure gate is reassigned to a remote terminal, abandon your lounge access plan immediately to ensure you reach the new gate before boarding concludes. Use the lounge primarily as a tool for managing disruptions rather than a destination for leisure during tight transit windows.
How to handle missed connections on single versus separate tickets
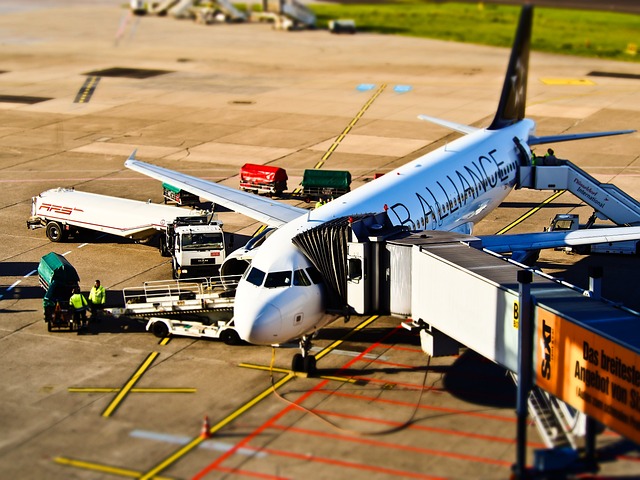
On a single ticket, the airline is legally obligated to rebook you on the next available flight at no cost if a delay causes a missed connection, and must provide hotel vouchers or meal stipends for overnight disruptions within its control. Separate tickets are independent contracts; the second carrier has zero obligation to assist you, forcing you to purchase a new ticket at current market rates.
The mechanism is the interline agreement: airlines on a single itinerary share liability through a common reservation system that automatically monitors connection times. Self-booking separate tickets makes you the travel agent, absorbing all operational risks including mechanical failures, air traffic control ground stops, and crew scheduling issues. You also assume the entire baggage chain, requiring you to exit the secure area, reclaim checked bags, and re-check them at the ticket counter for the second flight.
Exceptions exist for travelers with high-tier elite status or premium credit cards, which may provide lounge access. These lounges often feature dedicated service desks that can rebook even on separate tickets, though this is a courtesy, not a contractual guarantee. Another edge case involves specific airline partnerships allowing through-checked baggage on separate tickets, but this is rare and requires manual verification with ground staff. Relying on these exceptions is a high-risk strategy that often fails during peak travel periods when staff are overwhelmed.
The most common tourist mistake is booking separate tickets with a buffer that only meets the official minimum connection time (MCT). Because MCT is a technical reservation limit rather than a safety guarantee, it leaves zero margin for error. If you must book separate tickets, aim for a minimum of four hours between flights to account for potential terminal changes, customs processing for international arrivals, and the need to clear TSA security again.
| Feature | Single Ticket | Separate Tickets |
|---|---|---|
| Rebooking Responsibility | Airline | Passenger |
| Baggage Transfer | Automatic | Manual Re-check |
| Delay Compensation | Carrier-dependent | None |
| Risk Level | Low | Extreme |
| Minimum Buffer | MCT | 4+ Hours |
Before finalizing any itinerary, confirm your arrival and departure terminals using the airline’s real-time flight status tool. If your transfer requires a terminal change, add at least 60 minutes to your buffer to account for landside shuttle transit and security screening volatility. Always prioritize single-ticket bookings to ensure the carrier retains the legal obligation to get you to your final destination.
Using Global Entry and MPC for international arrivals
Global Entry and Mobile Passport Control (MPC) accelerate U.S. customs processing for international arrivals but do not eliminate the mandatory requirement to collect and re-check baggage at your first port of entry. Global Entry provides access to dedicated kiosks that bypass standard immigration lines, while MPC allows you to submit your customs declaration via a mobile app to receive a digital receipt for a dedicated express lane. Both programs reduce wait times during peak arrival windows without altering the underlying logistics of international-to-domestic transfers.
Global Entry requires a $120 application fee for a five-year membership and includes TSA PreCheck, making it the most efficient choice for frequent international travelers. MPC is free, requires no prior enrollment, and is available to U.S. citizens, Canadian B1/B2 citizens, and Lawful Permanent Residents. If you encounter an unusually long queue at Global Entry kiosks, you may still utilize the MPC lane if you have the app prepared, providing a useful contingency when one system experiences technical delays or high volume.
| Program | Eligibility | Cost | Primary Benefit |
|---|---|---|---|
| Global Entry | Pre-approved travelers | $120 (5 years) | Dedicated kiosks, includes PreCheck |
| Mobile Passport Control | U.S./Canadian/LPR | Free | Express lane via mobile app |
| Standard Lane | All passengers | Free | Manual processing |
The most common mistake is assuming that expedited customs clearance grants extra time to reach a connecting flight without accounting for baggage transit. After clearing immigration, you must physically retrieve your checked bags from the carousel and proceed through customs inspection before dropping them at the re-check desk located immediately outside the customs exit. Even with a smooth customs experience, this physical transfer process typically consumes 30 to 45 minutes, regardless of how quickly you clear passport control.
If you hold elite status with your airline, seek out the priority re-check desk near the customs exit, as these are often staffed to assist premium passengers with expedited baggage handling. For those without status, ensure you have your baggage claim tags ready before landing to expedite the identification process at the carousel. If you are traveling on separate tickets, this baggage re-check step is the most frequent point of failure, as you are required to re-check your bags at the ticket counter of your second carrier, which may be located in a different terminal.
Download the official CBP Mobile Passport Control app and complete your profile before departure to ensure you can activate it the moment you land. If you are a frequent international traveler, prioritize the Global Entry application process, as the inclusion of TSA PreCheck provides a secondary efficiency gain when you eventually clear security for your domestic connection. Always budget for the full baggage reclamation process regardless of which expedited entry method you use.
Leveraging elite status for priority rebooking during disruptions
Elite status is the primary mechanism for priority rebooking during irregular operations, automatically positioning you ahead of general passengers in the airline’s recovery algorithm. High-status members receive preferential treatment in automated rebooking systems and expedited access to service desks, bypassing the long wait times faced by standard passengers. This functions through internal reservation flags that trigger preferential routing during mass cancellations and hub disruptions.
Your status level directly determines your position in the recovery queue; top-tier elites often secure seats on the next available flight before lower-tier members are notified of a cancellation. If you lack top-tier status, bridge the gap by utilizing dedicated premium support lines, which are staffed by agents with greater authority to override standard ticketing restrictions. Always state your status immediately upon reaching an agent, as this influences the level of flexibility provided, especially for complex re-routings or partner airline connections.
Exceptions apply during total hub shutdowns or severe operational collapses, where even top-tier status may not guarantee an immediate seat if inventory is exhausted across all carriers. Premium cabin passengers may receive rebooking priority comparable to elite members, regardless of loyalty tier. A common error is waiting in physical lines at the gate or customer service desk, which is the least efficient method. Instead, use the airline’s mobile app or call the dedicated elite status phone number to bypass the physical queue entirely.
| Status Level | Rebooking Priority | Support Access |
|---|---|---|
| Top Tier (e.g., Diamond/1K) | Highest | Dedicated 24/7 Line |
| Mid Tier (e.g., Gold/Platinum) | High | Priority Phone Queue |
| Entry Tier (e.g., Silver) | Moderate | Standard Priority |
| General Member | Standard | General Queue |
To maximize rebooking success, save the dedicated elite support phone number to your contacts before arriving at the airport. If you hold a premium co-branded credit card, verify if it grants access to airport lounges, as lounge agents often have more autonomy to solve complex routing issues than gate agents. If stuck in a physical line, immediately open the airline app to check for automated rebooking options or use the chat feature to initiate contact with an agent while you wait.
Avoiding common booking mistakes at high-risk hubs
Do not book connections at high-risk hubs during peak seasonal windows unless you have at least 120 minutes of buffer time for domestic transfers or 180 minutes for international arrivals. Hubs like Atlanta (ATL), Chicago (ORD), and Dallas (DFW) experience high volumes of air traffic control ground stops that frequently cascade into missed connections. When you book a tight connection, you rely on the airport’s operational efficiency remaining perfect, which is rarely the case during summer months or holiday travel periods.
The primary mechanism for failure at these hubs is the reliance on official Minimum Connection Time (MCT) data. Reservation systems display the absolute shortest interval allowed by the airline, but these figures do not account for gate-to-gate distances that can exceed a mile or the reality of boarding doors closing 15 minutes before departure. If you book a connection at or near the MCT, you have zero margin for error when your incoming flight experiences a 20-minute taxi delay or arrival gate congestion.
A common mistake is assuming that all terminals within a major hub are connected airside. At airports like Los Angeles (LAX) or New York (JFK), a terminal change often requires exiting the secure area, navigating landside shuttles, and re-clearing TSA security. If you are traveling on separate tickets, you must also reclaim and re-check your baggage, a process that adds significant time regardless of elite status or use of expedited screening programs like CLEAR or TSA PreCheck.
When planning your itinerary, identify if your connection requires a change of airline alliance. Many carriers will not interline baggage to a non-partner airline, forcing you to manage your own luggage transit through the terminal. This increases the complexity of your connection and makes it nearly impossible to meet standard MCT requirements. Always check the official airport authority website for real-time terminal maps and transit instructions before finalizing your booking.
| Strategy | Risk Level | Recommended Buffer |
|---|---|---|
| Single Ticket (Domestic) | Low | 90 Minutes |
| Single Ticket (International) | Moderate | 150 Minutes |
| Separate Tickets (Domestic) | High | 240 Minutes |
| Separate Tickets (International) | Extreme | 300+ Minutes |
If you find yourself on a single-ticket itinerary that falls below these recommended buffers, check your airline’s mobile app for real-time gate assignments 24 hours before departure. If you are forced to book separate tickets, prioritize a four-hour window to account for the possibility of re-checking baggage and re-clearing security.
What to do next
Mastering your airport transit requires proactive planning and a realistic assessment of your specific itinerary. Use the checklist below to ensure your next connection is as seamless as possible.
| Step | Action | Why it matters |
|---|---|---|
| 1 | Verify airside terminal access | Prevents unexpected security re-clearing if terminals aren't connected. |
| 2 | Set alert for BTS performance | Helps identify if your hub is prone to frequent delays. |
| 3 | Book a 90-minute buffer | Avoids the high-risk nature of meeting only the absolute MCT. |
| 4 | Check baggage interlining | Ensures your bags reach your destination on separate tickets. |
| 5 | Register for MPC | Reduces customs wait times for international arrivals. |
| 6 | Locate lounge service desks | Provides immediate support for rebooking during irregular operations. |
Also worth reading 7 Major US Airports to Avoid Unlocking the LAX Maze Insider Hacks Demystifying Airport Assistance
Quick answers
How to identify terminal changes and security requirements?
Confirm your terminal and gate information via the official airport authority website or your airline’s mobile app no earlier than 24 hours before departure. Instead, prioritize itineraries with at least a 90-minute buffer, which typically adds only $30–$50 to the total fare b...
How to handle missed connections on single versus separate tickets?
Feature Single Ticket Separate Tickets Rebooking Responsibility Airline Passenger Baggage Transfer Automatic Manual Re-check Delay Compensation Carrier-dependent None Risk Level Low Extreme Minimum Buffer MCT 4+ Hours Before finalizing any itinerary, confirm your arrival and d...
What should you know about Minimum connection times for domestic and international flights?
For domestic-to-domestic transfers, 45 to 60 minutes is the industry standard at most U.S. hubs, though larger complexes like Atlanta (ATL), Chicago (ORD), and Dallas (DFW) often mandate 60 to 90 minutes to account for extensive gate-to-gate distances and terminal changes. Dom...
Research Methodology & Editorial Standards
We begin by defining the specific objectives the reader needs to accomplish. Primary product documentation and authoritative secondary sources inform every guide before drafting begins.
Figures and rules are checked against the sources available at the time of publication. Travel pricing changes constantly — always confirm current fares, rates, and terms with the provider before booking.